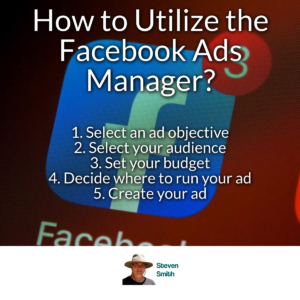
As the world’s largest social media platform, Facebook continuously introduces new features that make this advertising platform more innovative and easy to use. And one of those features is ‘Facebook Ads Manager. As the name suggests, you used this tool to manage your FB ads.
Let’s explore how to use ‘Facebook Ads Manager’ step-by-step.
Setting Business Manager Account:
To leverage this comprehensive tool’s potential, you first need to set up your Business Manager account. Just follow the given easy steps:
Step 1: Go to business.facebook.com
Step 2: Click on “Create Account”
Step 3: Enter a name for your business
Step 4: Select the primary Facebook Page for your account
Step 5: Provide your name and work email address
The next step is, setting up your advertising access through the Business Manager. For this, you have to:
- Open Business Manager ‘Settings’
- Under ‘People and Assets,’ click on “Ad”
- Select “Add New Ad Accounts”
- Click “Create a New Ad Account”
You have to set up your payment method and billing information. Once done, you’re ready to navigate to Facebook Ads Manager.
Navigating Facebook Ads Manager:
Facebook Ads Manager is your advertising “headquarters,” which allows you to:
- Set up ad campaigns, ad sets, and ads
- Manage and modify media spend
- Target specific audiences
- Monitor campaign performance metrics
To get started, you can access ‘Ads Manager’ by clicking the drop-down arrow in the upper-right corner of your Facebook page and select “Ads Manager.”
That’s it. Facebook Ads Manager is now ready for you to use. To start working with the Facebook Ads Manager, follow the instructions below:
#1 Select an ad objective:
Once you are in Ads Manager, select the green “Create Ad” button in the page’s top-right corner. You’ll need to choose a campaign objective, in other words, what you ultimately want to achieve with this ad: awareness, consideration, or conversion.
Once you’ve made your selection, create a campaign name –congratulations, you have completed your campaign!
#2 Select your audience:
Facebook’s audience targeting capabilities are its bread and butter. With so much demographic information captured by users worldwide, it’s possible to get extremely granular in who sees your ad.
Perhaps one of the best features offered in the Facebook Ad Manager is creating Lookalike Audiences. Lookalike audiences are Facebook users who share similar qualities to other known groups (i.e., your customers, your Facebook fans, or available brand loyalists.)
When you create a Lookalike Audience, you can identify the initial criteria on your own or upload a custom audience list. Facebook will identify common qualities of the people (i.e., demographic information, location, or interests) and find similar people (or Lookalike).
Essentially, this feature allows you to take your marketing team’s list of existing customers and expand your advertising reach.
To ensure your Lookalike Audience quality, Facebook recommends that you upload an audience list of 1,000-50,000 people to better target results.
#3 Set your budget:
Facebook then allows users to take control of how much they want to spend on each ad.
There are currently two main ways to allocate media spend:
- Daily media spend (the average dollar amount you’ll pay per day on an ad)
- Lifetime media spend (how much money you will spend over a set duration of time on an ad).
While Facebook suggests a $20.00 daily budget by default, you can constantly adjust your budget while the campaign is live with either option.
#4 Decide where to run your ad:
If you use Facebook, you will have seen ads pop up on your mobile news feed, a desktop news feed, and on the right side of your screen (right column). With Facebook’s acquisition of Instagram, you can create ads on Facebook Ads Manager for Instagram. It’s your decision which social media platform you choose where to run your ads.
#5 Create your ad:
You’re almost there! Now that you have set up your campaign, audience, and placement, it’s time to input the creative and copy.
It mainly consists of three things: Ad Image: Facebook allows you to upload and test up to 6 different images, so if you’re not sure what to choose, experiment!
Insert Copy: Populate each field to insert a copy for your ad. People scroll their Facebook pretty quickly, so you need to ensure you grab your audience’s attention from the get-go.
Insert CTA: Be explicit about the call-to-action, whether it urges them to click to learn more or sign up for an upcoming event.
#6 Place your order:
Once you have created your Facebook ad, click the green “Place Order” button. Your ad will be screened to ensure it does not violate Facebook’s Advertising Policies before it is approved and goes live.
#7 Monitor performance:
As mentioned previously, you have full transparency in Ads Manager on your ads’ ROI (return on investment). Set a reminder at the same time every day to check in on your ads. If you’re not getting any traction, try tweaking the creative, copy, targeting, or media spend.
If you’re advertising on Facebook, you’re already one step closer to capturing the attention of your target audience. Good luck!
Thanks for reading
Steven Smith


